While air compressors are essential for many tasks, their complexity demands careful maintenance and troubleshooting. We recognize that tackling repairs yourself can seem intimidating, but with systematic approaches and safety precautions, many issues are manageable. Proper diagnosis and routine checks can prevent costly failures and guarantee reliable performance. To do so effectively, it’s vital to identify common problems and know when to seek professional help. Let’s explore these steps in detail to keep your compressor running smoothly.
Key Takeaways
- Systematically inspect and troubleshoot components like pressure relief valves, hoses, and switches to identify root causes of issues.
- Regularly check and replace filters and oil to maintain compressor efficiency and prevent overheating.
- Use soapy water to detect leaks and tighten fittings without over-tightening to avoid damage.
- Verify safety features such as pressure relief valves and shut-offs function properly before use.
- Seek professional help for complex repairs, safety failures, or internal component damage to ensure safe operation.
How to Diagnose Common Air Compressor Problems
When diagnosing common air compressor problems, it’s essential to systematically evaluate each component to identify the root cause. Proper air compressor maintenance guarantees all parts function correctly and prevents safety hazards. Start by inspecting the pressure relief valve for proper operation and verifying that safety shut-offs engage as designed. Check the compressor’s intake filter for clogs, which can cause overheating or reduced efficiency. Listen for abnormal noises that may indicate worn bearings or misaligned belts. Measure pressure levels and compare them to manufacturer specifications. Regularly testing safety features and ensuring secure electrical connections are critical for compressor safety. By methodically examining these elements, we can accurately pinpoint issues, optimize performance, and maintain safe operation during repairs.
Checking and Replacing Air Compressor Oil
Maintaining proper oil levels is essential for ideal compressor performance, so we start by inspecting the oil dipstick or sight glass to guarantee adequate lubrication. When oil appears dark, contaminated, or has a burnt smell, it’s necessary to drain and replace it with fresh, manufacturer-recommended oil. Regularly checking and changing the oil prevents excessive wear and extends the lifespan of your compressor.
Checking Oil Levels
Regularly checking the oil level in your air compressor is essential to guarantee ideal performance and prevent damage. Use the dipstick or sight glass to ensure the oil is within the recommended range. Maintaining correct oil levels supports proper lubrication, reducing wear on internal components. When inspecting, assess oil quality; dirty or contaminated oil can impair compressor function. If the oil appears dark or gritty, it’s time for a change, but avoid overfilling, which can cause overheating. Proper oil disposal is critical—dispose of used oil according to local regulations to prevent environmental harm. Consistent monitoring ensures peak operation, prolongs the compressor’s lifespan, and minimizes costly repairs. Accurate oil level checks are a simple yet indispensable step in DIY compressor maintenance.
Replacing Old Oil
Over time, the oil in your air compressor can degrade due to heat, contaminants, and use, which diminishes its lubricating properties and can lead to increased wear on internal components. Regularly checking and replacing old oil guarantees peak performance. When replacing, consider oil viscosity; using the correct viscosity maintains proper lubrication. Contaminated oil can cause internal blockages and reduce efficiency, so it’s essential to drain and replace it when dirty. Use the table below to determine oil compatibility and maintenance schedule:
| Oil Type | Recommended Change Interval |
|---|---|
| Mineral | Every 150 hours |
| Synthetic | Every 300 hours |
| Contaminated | Immediately |
| Incorrect Viscosity | Replace immediately |
Proper oil management minimizes wear and prolongs compressor lifespan.
How to Inspect and Fix Air Leaks
To effectively address air leaks, we start by systematically identifying potential leak sources, such as fittings, hoses, and valves, using soapy water to detect escaping bubbles. Once identified, we focus on sealing leaks with appropriate solutions like Teflon tape or thread sealant to restore compressor efficiency. Precise inspection and targeted sealing are essential for maintaining best performance and preventing energy loss.
Identifying Leak Sources
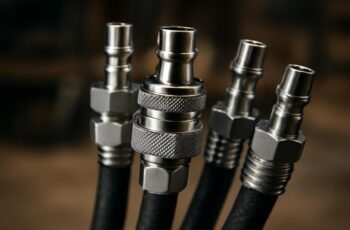
When diagnosing air leaks in your compressor system, the first step is to systematically inspect all connections, fittings, and hoses for signs of escaping air. Focus on joints between air compressor accessories, such as pressure gauges, hoses, and valves, as these are common leak points. Use a soapy water solution to identify bubbles indicating leaks, especially around threaded fittings. Pay close attention to the condition of hoses—cracks or brittleness can cause leaks that reduce energy efficiency. Tighten fittings carefully, but avoid over-tightening, which can damage components. By accurately pinpointing leak sources, you guarantee ideal compressor performance and energy savings. Proper identification of leaks helps maintain consistent pressure and prolongs the lifespan of your air compressor system.
Sealing Air Leaks
How can we effectively inspect and fix air leaks in your compressor system? First, we’ll perform a thorough visual inspection, checking all hoses, fittings, and connections for cracks or deterioration. Next, to detect elusive leaks, we use a soap solution applied to suspected areas—bubbles indicate leaks. Alternatively, a ultrasonic leak detector offers precise identification, especially in noisy environments. Once identified, sealing these leaks with appropriate methods—thread sealant, replacement fittings, or rubber tape—restores system integrity. Proper sealing improves air quality by reducing contaminants entering the system and minimizes noise levels, contributing to noise reduction. Consistent leak management ensures *ideal* compressor performance, prolongs equipment lifespan, and maintains consistent output pressure. This precise approach guarantees a safer, more efficient compression system.
Troubleshooting and Replacing the Pressure Switch
Since the pressure switch regulates the compressor’s operational cycle, diagnosing issues with it is vital for proper function. Troubleshooting techniques include inspecting the switch for visible damage, corrosion, or debris that may interfere with its operation. Use a multimeter to test continuity when the compressor reaches the cut-in and cut-out pressures; inconsistent readings suggest a faulty switch. If the switch fails to respond appropriately or remains engaged regardless of pressure levels, replacement is necessary. Disconnect power before removing the switch, noting wiring connections for accurate reinstallation. When replacing, verify the new pressure switch matches the specifications of the original. Proper diagnosis and timely replacement of the pressure switch are essential to prevent compressor failure and ensure safe, efficient operation.
How to Clean or Replace the Air Filter
Regularly inspecting and maintaining the air filter is crucial for ideal compressor performance, as a clogged or dirty filter can reduce airflow and strain the motor. To perform air filter maintenance, first remove the filter housing and assess the filter’s condition. If dirty, clean it with compressed air or replace it entirely using proper filter replacement techniques. Keep in mind, a clean filter guarantees optimal air intake and prolongs compressor lifespan. Below is a quick reference table for filter options:
| Filter Type | Cleaning Method | Replacement Interval |
|---|---|---|
| Paper | Replace only | Every 3-6 months |
| Foam | Wash with soapy water | Every 6 months |
| Pleated | Replace or clean | Every 6-12 months |
Proper air filter maintenance enhances efficiency and prevents damage.
Testing and Repairing the Pressure Relief Valve
Before performing any maintenance, we need to verify that the pressure relief valve (PRV) functions correctly to guarantee safe operation. Conduct a thorough valve inspection by first releasing any residual pressure from the compressor. Carefully remove the PRV and inspect it for signs of corrosion, debris, or damage. To test the pressure relief, attach a handheld pressure gauge to the valve outlet and gradually increase pressure to the manufacturer’s specified limit. The valve should open smoothly at this set point, releasing excess pressure, then reseal securely. If it fails to open or reseals improperly, replacement is necessary. Proper valve inspection and testing ensure the pressure relief functions reliably, preventing over-pressurization and maintaining safe compressor operation.
How to Address Unusual Noises and Vibrations
Unusual noises and vibrations often indicate underlying issues within the compressor that require prompt diagnosis and correction. Effective vibration analysis helps pinpoint the source, whether it’s misaligned components or worn bearings. To address these concerns, consider the following noise reduction techniques:
- Inspect mounting hardware to verify the compressor is securely fastened, reducing resonant vibrations.
- Balance rotating parts by checking for imbalance in the flywheel or pulley system, which minimizes excessive vibrations.
- Apply damping materials around vibrating surfaces to absorb shock and reduce noise transmission.
How to Reset or Calibrate Your Air Compressor
To accurately reset or calibrate your air compressor, we first identify calibration indicators such as pressure gauges and control panel alerts. Next, we adjust pressure settings according to manufacturer specifications and perform calibration procedures using diagnostic tools. Ensuring these steps are precise will optimize performance and maintain safety standards.
Identifying Calibration Indicators
Calibration indicators are essential for maintaining accurate pressure output and overall compressor performance. They help us monitor measurement accuracy and guarantee the device functions within specified parameters. To effectively identify calibration indicators, consider these visual cues:
- Gauge Readings: Look for deviations between the pressure gauge and known reference standards. Inconsistent readings suggest calibration issues.
- Sensor Alignment: Inspect internal sensors for misalignment or damage, which can compromise measurement accuracy.
- Calibration Labels or Marks: Check for calibration stickers or marks indicating recent calibration dates or compliance with standards.
Recognizing these indicators allows us to assess when recalibration or adjustments are needed, assuring the compressor maintains ideal measurement accuracy for safe, reliable operation.
Resetting Pressure Settings
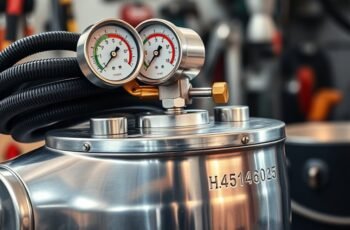
Resetting pressure settings on your air compressor guarantees it operates within safe and ideal parameters. To do this, first verify the compressor is unplugged. Then, locate the pressure gauge and safety valve. Adjust the pressure regulator to your desired maximum PSI, observing the pressure gauge for accuracy. If the pressure gauge reads incorrectly, it may need replacement or calibration. Once set, manually release air via the safety valve to verify it opens at the designated pressure, ensuring safety. Always confirm the pressure does not exceed manufacturer specifications. Here’s a quick reference:
| Step | Action | Key Component |
|---|---|---|
| 1 | Set regulator | Pressure gauge |
| 2 | Release air | Safety valve |
| 3 | Verify pressure | Pressure gauge |
This process helps maintain safe, reliable compressor operation.
Performing Calibration Procedures
Performing calibration procedures on your air compressor guarantees that pressure readings are accurate and that the system operates within specified safety limits. Accurate calibration is essential for maintaining measurement accuracy and ensuring peak performance. To calibrate effectively, follow these steps:
- Attach a calibrated, precision pressure gauge to the compressor’s test port.
- Run the compressor to its maximum operating pressure, then compare the gauge readings with the compressor’s built-in pressure indicator.
- Adjust the pressure regulator or calibration screw as needed to align the built-in gauge with the reference gauge.
This process ensures measurement accuracy, reduces over-pressurization risk, and enhances operational safety. Regular calibration is critical for maintaining reliable pressure control and prolonging the compressor’s lifespan.
Essential Tools and Safety Tips for DIY Repairs
When undertaking DIY air compressor repairs, having the right tools is essential to guarantee safety and efficiency. Key air compressor accessories include adjustable wrenches, screwdrivers, and a multimeter for electrical testing, ensuring precise diagnostics. Safety gear such as gloves, safety glasses, and hearing protection must be prioritized to prevent injury during repairs. Proper tools enable accurate disassembly, component replacement, and reassembly, reducing the risk of damage or malfunction. Familiarity with DIY repair safety protocols, like depressurizing the tank and disconnecting power before servicing, minimizes hazards. Investing in quality tools and adhering to safety guidelines ensures a controlled repair environment, leading to reliable operation post-repair and extending the compressor’s lifespan.
When to Seek Professional Help for Air Compressor Repairs
Recognizing the limits of DIY repair skills is essential to maintaining safety and guaranteeing the compressor functions correctly. When faced with complex issues, such as persistent leaks, unusual vibrations, or electrical faults, professional intervention becomes necessary. Specifically, consider seeking help if:
Know your limits: seek professional help for complex compressor repairs to ensure safety and proper function.
- The compressor fails safety inspections, risking air compressor safety protocols.
- Repairs exceed routine maintenance scheduling, indicating advanced mechanical or electrical issues.
- Troubleshooting reveals potential internal component damage or calibration errors beyond basic adjustments.
In these cases, professional technicians possess specialized diagnostic tools and expertise to prevent injury and equipment damage. Addressing issues promptly ensures ongoing safe operation and peak performance, aligning with recommended maintenance schedules. Always prioritize safety and precision over DIY shortcuts in complex repair scenarios.
Frequently Asked Questions
How Often Should I Perform Maintenance on My Air Compressor?
We suggest performing maintenance on your air compressor every 1 to 3 months, depending on usage, to extend its lifespan. Following a regular maintenance schedule guarantees peak performance, prevents breakdowns, and maximizes the compressor’s longevity.
Can I Use Alternative Oils if I Run Out of Compressor Oil?
You can’t use alternative oils without checking oil compatibility first; using incompatible oils risks damaging the compressor. Always consult your compressor’s manual or manufacturer to confirm the alternative oils meet specific specifications and won’t harm the system.
What Are Signs of a Failing Pressure Switch?
When a pressure switch malfunctions, warning signs like inconsistent pressure, frequent cycling, or failure to turn on/off indicate failure. Recognizing these signs early helps prevent compressor damage, ensuring reliable operation and avoiding costly repairs down the line.
How Do I Prevent Rust Inside My Air Compressor Tank?
To prevent rust inside your air compressor tank, we regularly perform tank cleaning and apply rust prevention coatings or desiccants, which reduce moisture buildup, inhibit corrosion, and maintain internal conditions ideal for compressor longevity.
Is It Safe to Repair an Electrical Component Myself?
We believe that, for electrical safety, DIY troubleshooting should be approached cautiously; if you’re inexperienced, it’s safer to consult a professional. Proper precautions and understanding are essential to avoid hazards when repairing electrical components yourself.
Conclusion
By following these DIY repair tips, we can keep our air compressors running efficiently and safely, much like a well-tuned engine of yore. Regular inspections, proper maintenance, and safety precautions are paramount. However, if a problem exceeds our expertise, remember that consulting a professional is wise—better safe than sorry. With careful attention and the right tools, we guarantee our compressor remains a reliable workhorse, avoiding the pitfalls of a mechanical quagmire.